

Carving a Thunderbird
Please Visit Reclaiming Shingwauk Hall.

Carving from drawings on basswood log,
sourced from traditional Algonquin land.
I have a rough plan to follow.

Roughing in the head and
shoulders and slowly working back towards the tail.
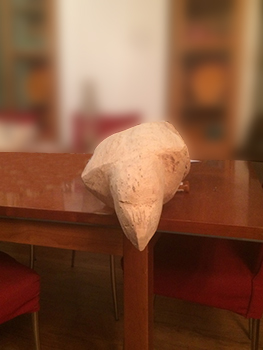
Just wanting to free the body from the log.

Finally out of the log, shaping the body and underside, smoothing out head, shoulders, belly and roughing in the hind legs and feet.

View of the stomach and roughed in feet.
Not quite right but more wood has to be
removed from the tail first.
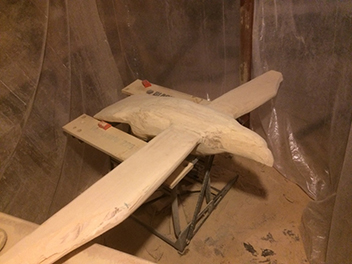
Checking the angle of the banking thunderbird.
Head must be vertical to angle of body.

A little concerned with how much support the
dowels will give the wings!

Panic sets in!
The wings look stiff and unnatural!
I am hoping that will be temporary
Follow the plan!
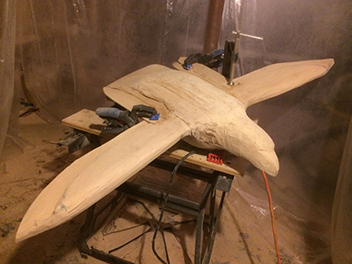
Leading edge looking better, feeling some relief.
Continuing to refine body shape and size

Shortening of the wings and carefully removing material to place the individual top layer of feathers. Also refining a gentle arch in the wings
After cutting individual feathers from finely milled basswood, it's time to glue and clamp them to the top.

I'm pleased with the look of the feathers.
It seems to be turning the planks into believable wings

The last feathers for the top of the wings!
I sand and shape the body and head
while the glue is drying.

Starting to glue the feathers to the underside of the wings.

While the bottom layer of feathers firmed up in the glue,
I shaped the feet and tail.

Shortening the feathers, shaping and sanding!

Final steps include, painting, sanding, adding
copper leaf to the beak and feet and adding a
clear coat of varnish to protect it.
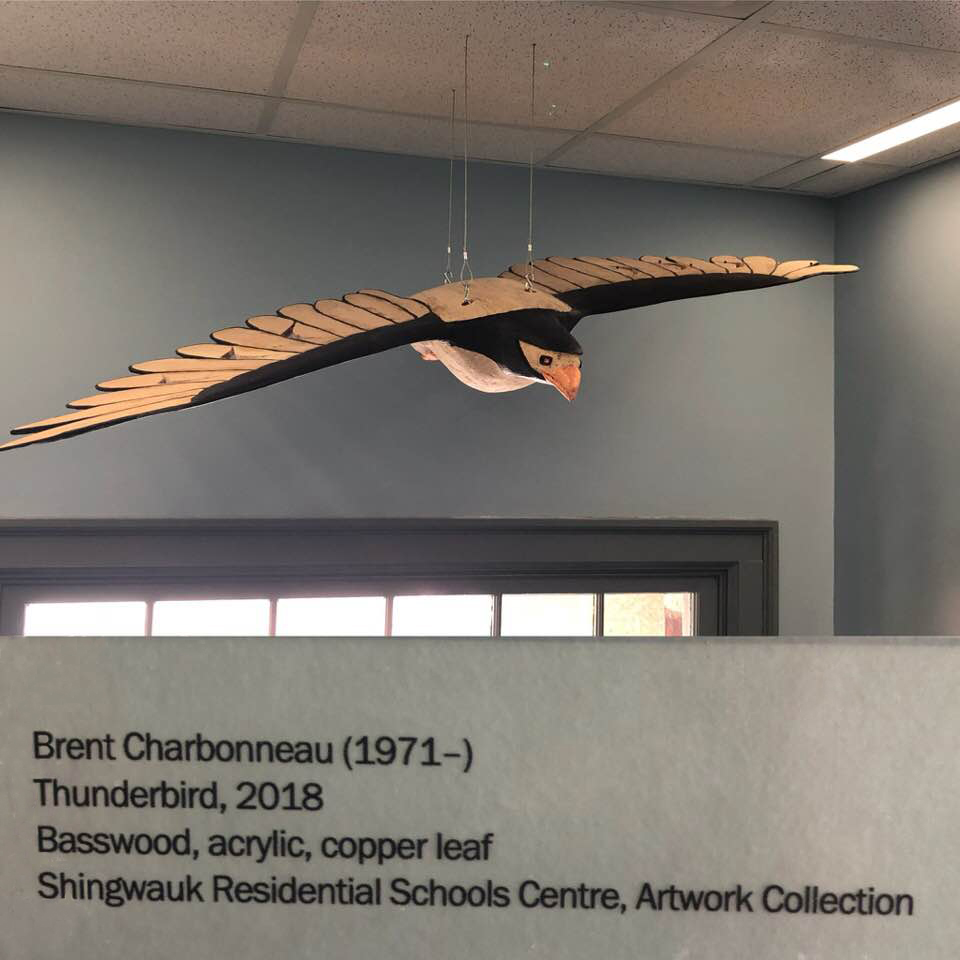
Finally flying free!